Step-by-Step Guide for Installing LED Batten Light
LED batten light is becoming increasingly popular because of their energy economy, durability, and adaptability.
Whether you’re renovating your house or improving your office, adding LED Batten Lights may drastically improve your lighting experience.
In this step-by-step guide, we’ll show you how to install LED Batten Lights to effectively light your room.
Introduction to LED Batten Lights
What is LED batten light?
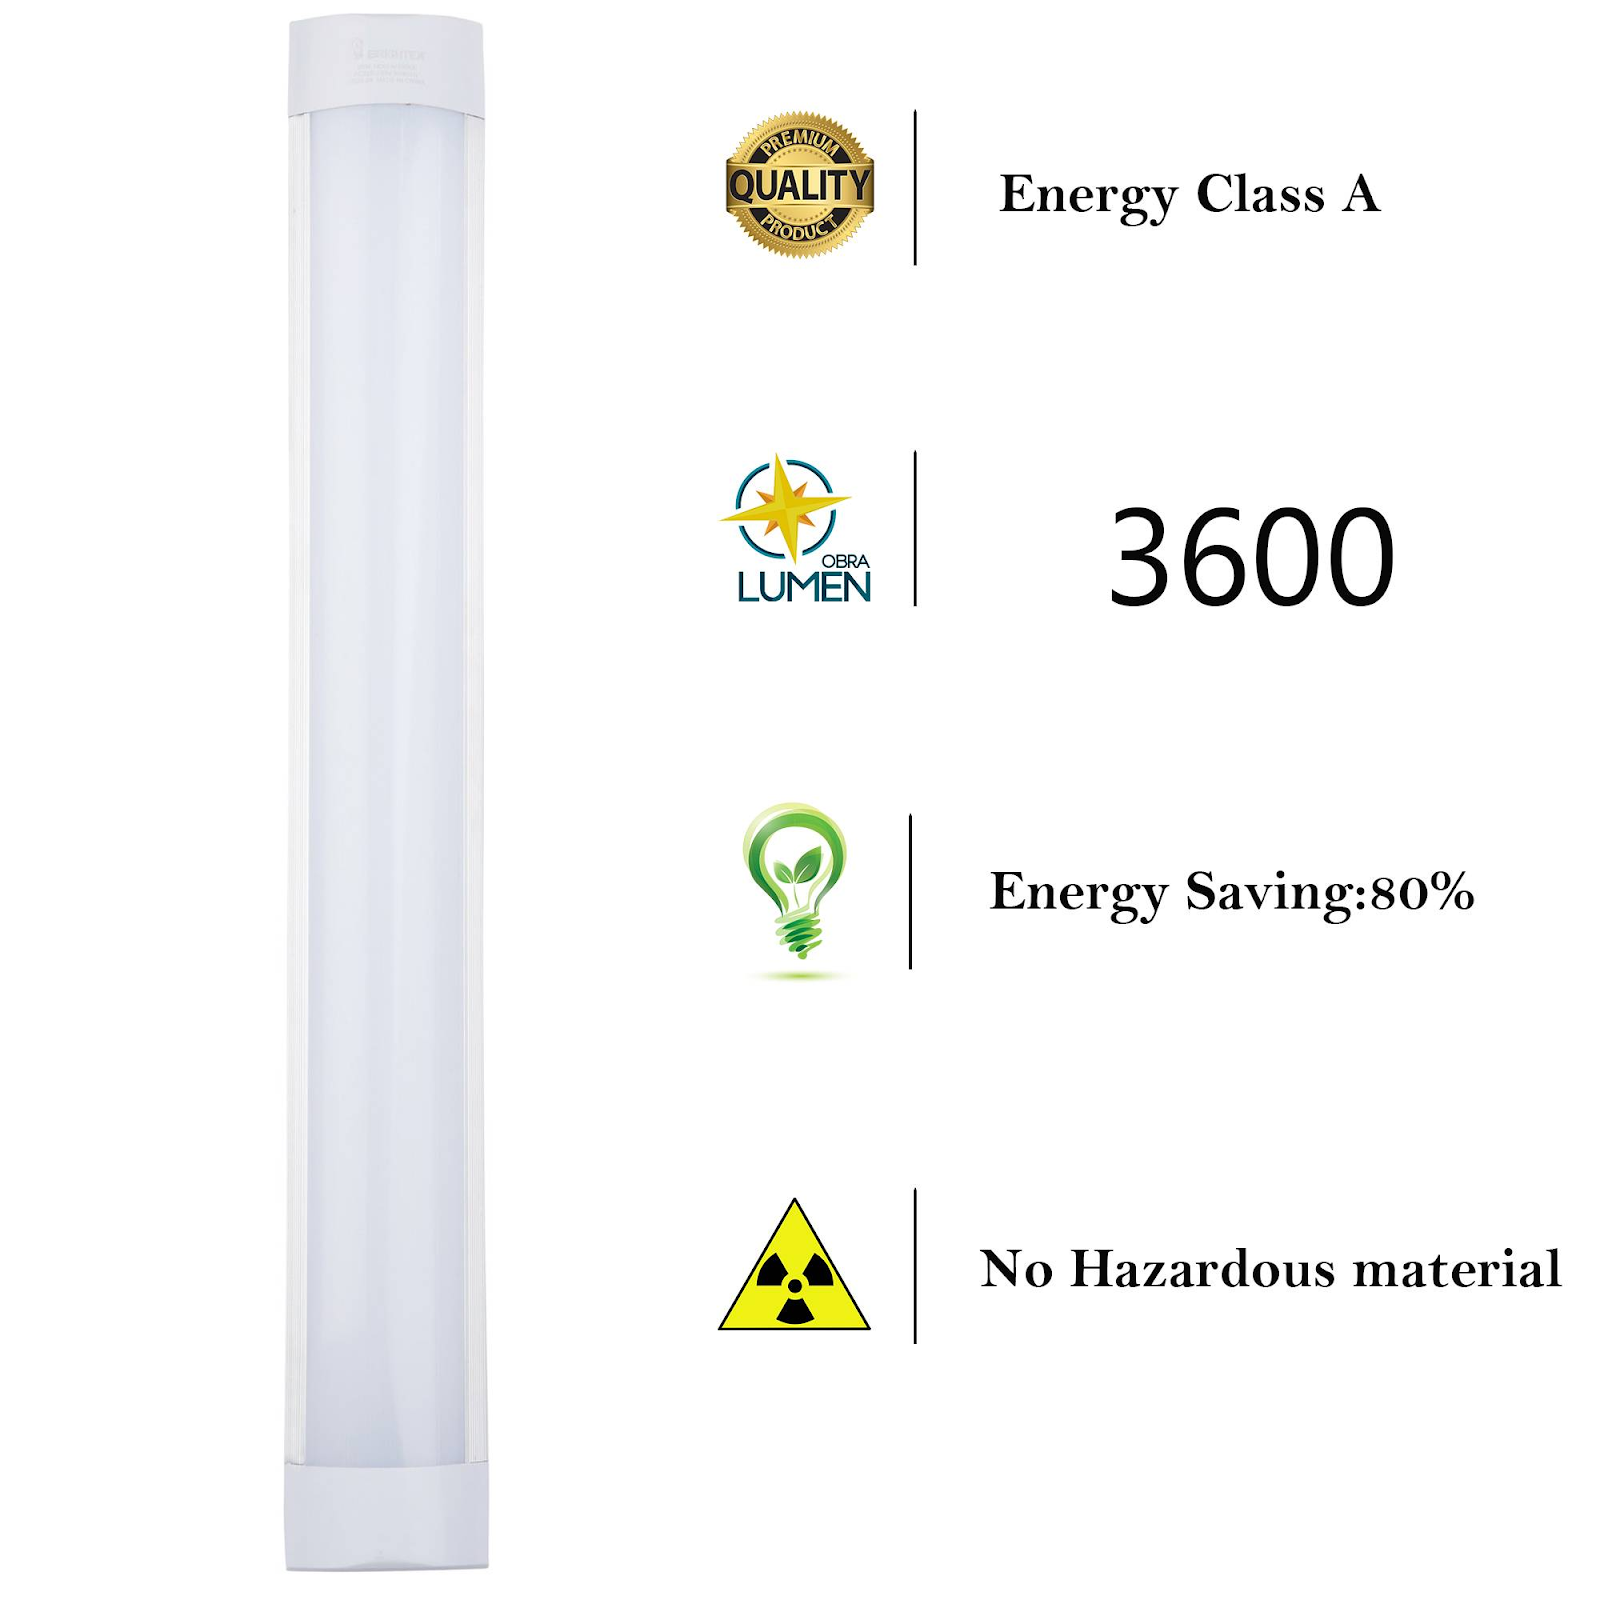
LED Batten Light is long, thin lighting fixtures that are commonly utilized for commercial, industrial, and residential applications.
They use LED (Light Emitting Diode) technology, which is brighter and more energy efficient than traditional lighting.
LED Batten Lights are available in a variety of lengths and wattages, making them ideal for a wide range of applications.
Benefits of LED Batten Lights
- LED batten light offers energy efficiency, resulting in cheaper power costs and a lower carbon impact compared to conventional lighting.
- LED Batten Light offers a longer lifespan than traditional fluorescent or incandescent lights, requiring fewer repairs and maintenance expenditures.
- LED batten light produces bright, uniform illumination that improves vision and creates a comfortable environment.
- LED Batten Light may be put in a variety of settings, including workplaces, warehouses, garages, kitchens, and retail stores.
Pre-installation Preparation
- Assessing the Installation Area!
Before installing LED Batten Light, evaluate the installation area to determine the number of units required and the ideal location for effective illumination coverage.
Consider the ceiling height, room proportions, and existing electrical wiring.
- Gathering the necessary tools and materials
Gather the necessary tools and supplies before beginning the installation process:
- LED Batten Light Fixture(s)
- Screwdriver
- Drill (if required)
- Wire Strippers
- Wire Connectors
- Electrical Tape
- Ladder or Step Stool
- Safety Glasses
- Voltage Tester
Steps to Install
- Turning Off the Power Supply
When working with electrical components, safety is the most important consideration.
Before you begin the installation, switch off the power to the area where you will be putting the LED Batten Lights.
Locate the circuit breaker or fuse box and turn off the appropriate circuit.
- Marking the mounting points.
Use a pencil or marker to mark the mounting places on the ceiling where the LED Batten Light fixtures will be installed.
Ensure that the mounting points are suitably spaced and aligned with your preferred lighting configuration.
- Drilling holes, if necessary
If holes must be drilled to install the fixtures, use a drill and an appropriate drill bit size to produce the holes at the designated positions on the ceiling. Be aware of any electrical wires or structural obstructions in the ceiling.
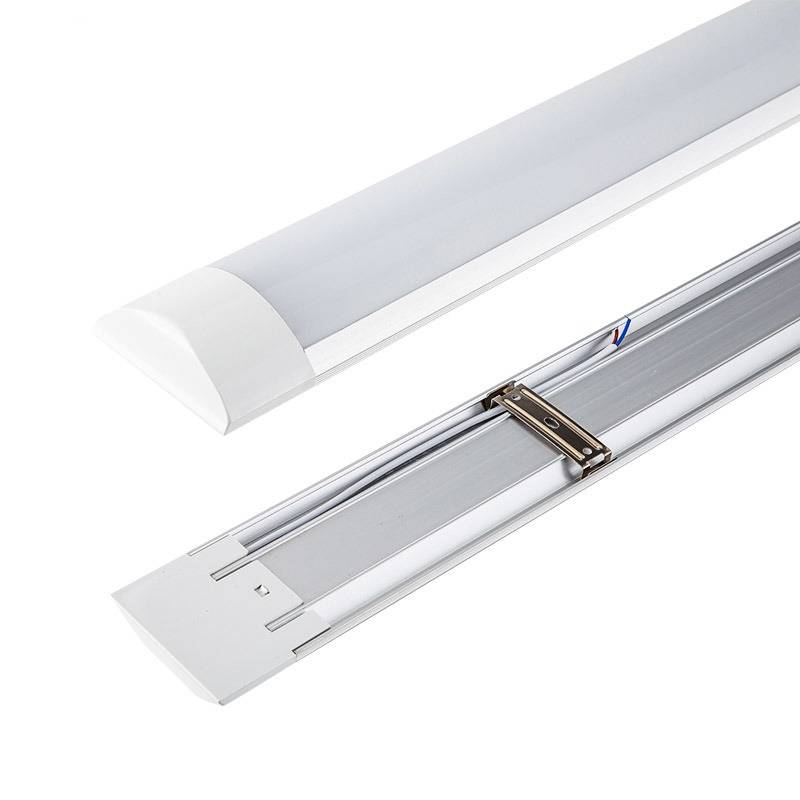
- Mounting the LED Batten Light Fixture
Align the LED Batten Light fixture’s mounting holes to the designated positions on the ceiling. Secure the fixture in position using screws or mounting brackets, making sure it is firmly secured and level.
- Wiring a Fixture
To wire the LED Batten Light fixture, carefully follow the manufacturer’s instructions. Strip the insulation from the electrical wires and attach them to the correct terminals with wire connectors.
Double-check the connections to verify they are secure and adequately insulated using electrical tape.
- Attaching the cover
Once the fixture has been firmly installed and connected, connect the cover or diffuser to the LED Batten Light.
This cover helps to properly distribute the light and protects the LED components from dust and debris.
Testing and adjustments
- Turning On the Power
After finishing the installation, turn on the circuit breaker or fuse.
To test the operation of the LED Batten Lights, turn on the light switch linked to them.
- Testing the functionality
Check that the LED Batten Lights are working properly by checking their brightness and uniformity of illumination. Check for flickering or abnormalities in the light output, which might indicate a problem with the wiring or a damaged component.
- Making adjustments as needed
If changes are required, such as relocating fixtures or resolving wiring issues, make the appropriate changes to guarantee peak performance.
If you run into any issues, consult the manufacturer’s instructions or seek expert help.
Conclusion
In conclusion, installing LED Batten Light is a straightforward process that can significantly enhance the lighting quality and energy efficiency of any space.
By following this step-by-step guide, you can enjoy the benefits of bright, long-lasting illumination while reducing your environmental impact and utility costs.
Leave a Reply